Today I will show in practice how to staple documents into 4 punctures. I provide explanations with photographs. I must say right away that this is not a professional binding. Professionally designed in a cardboard cover, the case looks like a regular book. But for an organization that is not a source of acquisition of the state (municipal) archive, this method of stapling documents is quite suitable: it complies with the rules of archiving.
How to stitch documents for the tax, tells. How to flash magazines and which ones, is described.
I emphasize: I show how to staple the documents of an organization that plans to store these documents for permanent or long-term storage exclusively in its own archive. In the archives of such companies, as a rule, there is no bucket with special glue and a paint brush, a binder press and a device for leveling stacks of papers, and my colleagues working in the offices, if and heard, it's definitely not about the documents. So, my master class on stapling documents is intended exclusively for amateurs who have at their disposal a pair of straight and growing hands from where they need to and some objects and materials. Our goal is to arrange cases in a cardboard cover a) correctly, b) quickly, c) on a budget, d) as beautifully as possible.
For more serious documents that will be stored for a long time, and even more so in the state archive, this method is hardly suitable. To do this, you will have to invite professionals.
How to staple documents: getting ready
We have a finished and ready to stitch case. To flash it, we need:
An ordinary drill or a powerful hole punch (a powerful one is one that fits 150 or more sheets at a time);
Cardboard cover "Case No." (the cheapest option; if you can find cardboard of the same quality in A4 format, it will be even easier: no need to cut);
Cardboard sheet for children's creativity;
Ruler;
Ballpoint pen (to draw lines for folding; whoever is comfortable with scissors - draw with scissors);
Scissors;
Thick thread or twine;
Large needle;
PVA glue;
Volume spine sticker.

You may also need paper clips or any other means to fix the tom so that it does not fly apart.
Cooking the cover
From the cardboard folder "Case No." we cut out two sheets of A4 format or take ready-made sheets.

We glue a sheet of cardboard for children's creativity to one of the A4 sheets by the left edge. The cover sheet should be facing us. Cardboard must be glued face down. This is the future spine. We make a strip of glue not wide, a couple of centimeters is enough. Put it under the press and let it dry properly

Pay attention to how much the sheet of children's cardboard is smaller than the cover. But the packaging says that its format is A4 ... Be careful when buying. I was not lucky this time, but maybe it's better: it turns out more clearly.
In order for our spine to go around the volume nicely and evenly, we mark three fold lines along the ruler with a pen: the first two after 2 and 4 cm from the left edge (necessarily on equal distance from each other), and the third - departing from the second line such a distance that is equal to the width of the volume. We do not regret the forces, we draw the lines deep. Actually, I usually use a pen that has run out of paste a long time ago, then I get a colorless fold line. But for MK it is better to be more visible.

We flash
We drill (pierce, punch) together: the volume of the case, the bottom cover (do not forget to put it correctly, the future face on the table), the top cover directly with the glued and lined sheet. The holes should fall strictly on the first strip of the cover we separated. The title page is not pierced!!!

We load the thread or twine into the needle and sew the volume. In this case, we need the tails of the threads to fall on the back of the volume. How to staple documents with a needle and where exactly to insert the needle is easier to show than to describe:

From the front it looks like this:

We tie the tails of the threads. You don’t need to tighten it too much, otherwise it will be very difficult to open the volume to make a copy of the documents. A small supply of thread for opening must be left.

We take our sewn volume and bend back the glued cardboard sheet:
On the first line - the threads are closed;
On the second line - the cardboard turns down, forming a spine;
On the third line - the cardboard hugs our volume and at the same time closes the knot on reverse side.
All folds are ironed with scissors.

We glue the rest of the cardboard on the back side of the outside of the cover, hiding the thread and knot under it. We do not regret glue and smear it on both surfaces in an even layer.

We send the volume under the press to dry.
Making out the volume
Now we take in hand title page and cut off 2 cm from its left margin. Solely for beauty, you can not do this. We glue the sheet to the volume and again under the press (in the photo the cover is still wet, so it does not look very neat; when dry, it will become white and even).

It remains only to glue the spine.
Volume open:

Due to the fact that we do not tighten the thread very much, it can be freely opened and copied.
As a press, it is very good to use a new box with reams of paper: it is quite heavy and has the perfect size. It seems that stitching is a long process due to the fact that you often have to put the volume under the press. But if you process several volumes at the same time, then you don’t have to wait until each one dries: while some volumes are under pressure, we prepare others, and so on in a circle. If you prepare the covers in advance, then in a working day, without particularly straining, you can sew 20 volumes.
Entrepreneurs and office workers in their work are faced with the need to correct design multipage documents. Supervisory authorities and higher organizations are known to be meticulous about the design business papers, and therefore sometimes there are difficulties. Let's figure out how to properly flash and number documents so that there are no unnecessary questions when submitting them.
Who handles the paperwork?
It seems that there is nothing complicated in flashing papers. But in fact, not everything is so simple. There is certain rules on which this is done. If you want to make a binder of newspapers or magazines for use within the organization, then this is one thing. But if you are faced with the task of preparing documents for the archive or the tax office, or somewhere else, then you need to approach the work with all responsibility, otherwise you risk getting the papers back. The reason for the refusal may be incorrect registration.
There are many such cases. And all due to the fact that we do not know how to properly flash and number documents. A sample design is unlikely to be provided in the tax or archive.
Now there are a sufficient number of firms involved in the firmware of documents. You can use their services. They certainly have great experience work. They offer a wide range of covers. But this is not always convenient. The fact is that printing houses are overflowing with orders. Let's say you need to do this job urgently. How then to be? It remains only to deal with this issue.

In addition, in conditions of economy, management is not always ready to pay extra expenses, and therefore this type of work falls on the shoulders of secretaries and accountants. So, it’s better to figure it out yourself once, so that there are no problems in the future. This knowledge may come in handy.
Help for beginners
We would like to point out that no common standards regarding how to flash documents. By the way, state structures They also don't provide any explanation. Which means you have to figure it all out yourself. In this we will be helped by the methodological recommendations of office work (order of the Federal Archives of December 23, 2009).
What do you need to flash documents?
Before you start the work itself, you need to prepare. You will need the following materials:
- The documents themselves.
- Glue.
- Paper.
- Needle.
- Awl.
- Hole puncher.
- Special threads.
- Company seal.

In general, the whole process can be divided into three stages. The first is preparation, the second is the firmware itself, the third is the certification of the finished document.
Which cover to choose?
Speaking about how to flash documents, you need to remember such a nuance as the design of the cover. Of course, in the printing house you will be offered beautiful options, but they are not always needed if we are talking not about the thesis.
For a small binder, a paper cover will suffice. If a long-term use of the binder is expected (for example, archiving for more than 25 years), then thick cardboard is used.
The cover can be standard size (A4 format) and non-standard. It already depends on the format of the sheets to be bound. The cover must fit the size of the document.
Pagination
When preparing papers for stitching, be sure to number the pages. The presence of numbering is prerequisite design. "What is it for?" - you ask. In order to make it impossible to tear out unnoticed, remove some of the sheets. This moment is very important. So let's talk about how to flash and number documents. There are some nuances here.

When putting down the numbering, you need to remember the rules:
- Sheets are numbered, not pages.
- Only Arabic numerals are used.
- The list of documents itself is not numbered.
- If you need to number the letter, then first it is assigned serial number envelope, and only then to each leaflet.
- If the Case is very large (as a rule, such files are archived), then it may consist of volumes, each of which will have its own numbering.
- If there are papers inside the binder on which numbers are already affixed, they should be re-numbered in a single format.
- If there are nested sheets large sizes(A3), they must be expanded and put a number in the upper right corner. Then fold again. It will be hemmed only at one edge.
- It happens that small documents (checks, certificates, etc.) are pasted onto the sheets. In this case, the sheet is given one number, but at the bottom of it a list of pasted papers is listed.
- When small documents are glued only to the corner, then each of them can be given a number.
- Drawings, diagrams, photographs, plans are also numbered.
To understand how to properly flash and number documents (a sample is given in the article), you need to consider the sequence of actions step by step.
What should I do if there are errors in the numbering?
Before that, you should make sure that the filing is correct. Look carefully at page numbers. If it turns out that some of them are missing, then you can enter an additional letter numbering. All the sheets will remain under their numbers, and on the missing ones you should write the number from the previous sheet and the letter.
In case of gross errors, it makes sense to carefully cross out what was written and make a correct entry next to it. All changes made must be reflected in the confirmation note.
Document Description
Before flashing documents with threads, it is better to check the correctness of the execution of the entire Case. After all, I would not want to embroider it later. As a rule, there are several packages of papers inside it. Absolutely the entire list must be listed in the inventory. It is compiled by the responsible person, indicating the date. The description is not numbered.
How to sew documents with threads in three holes?
If all the documents are prepared, then you can start flashing. To do this, you need special threads or you can use twine. Of course, it does not make sense to sew several leaves with a harsh thread, you can take a regular one folded in half.
So, let's go directly to the question of how to flash documents with threads. Photos from detailed description will serve as a visual addition to the algorithm of actions. Let's start with the fact that it is necessary to fasten the sheets so that later you can easily read the information presented on them. To do this, holes are pierced from the left edge, approximately at a distance of one and a half centimeters. There should be three holes. They are located on top of each other. Punctures can be made with a hole punch when the stack of sheets is small. For thick toms, you will need an awl. Prepare the thread, but do not make it too long, seventy centimeters will be enough.
How to flash documents correctly? A sample workflow is shown below. For convenience of explanation, let's assign numbers to the holes: top - 1, middle - 2, bottom - 3.

You need to start sewing from the back of the Case, passing the needle through hole 2 to the front side. In this case, one end of the thread will remain behind. Then, through 1 hole, the needle is again brought to the back. At the moment when the needle and the free end of the thread are behind the document, you need to move again to the front side, and then again to the back.
How to flash documents, we almost figured it out. It remains the case for the small. Once all the sheets are fastened, you can safely tie the threads into a knot on the back of the Case.

It must be tightly tightened so that it can then be sealed with a confirmation note. The ends of the threads must be left hanging freely from under the sticker.
How are documents certified?
Well, as you can see, there is nothing difficult in resolving the issue of how to flash documents with threads. The photos presented to your attention - direct to the confirmation. We just have to certify the completed sheets.
This is called a "certificate signature". To make it, you need to take a small piece of paper measuring 5 x 6 centimeters and glue it on the back so that it covers the knot. The ends of the thread should come out from under it and hang freely.

On this note you need to indicate how many pages were stitched. Then it is signed by the director, date and seal of the organization. In general, the certification signature is made either by the director of the company, or by one of the deputies. The seal itself is placed so that one part of it falls on the last sheet of the pack, and the other on the note.
Why are documents stitched?
We have already mentioned that filed documents are archived for storage, in addition, in the daily activities of an enterprise, it is very often necessary to fasten bundles of sheets. These can be contracts, and reports to the tax or other regulatory authorities. By the way, the tax authorities generally have very strict requirements in this regard. The use of a stapler is not permitted. This is considered a gross violation.

In general, the Ministry of Finance even gives its own recommendations on how to flash documents. So, the filing cannot be very voluminous. Optimal size- up to fifty pages. If there are a lot of documents, then it is better to break them into several Cases. There must be continuous numbering in Arabic numerals. The leaves are stitched with a coarse thread, which must be tied on the back of the finished document. From above, the knot is sealed with a confirmation note, which must be drawn up in accordance with all the rules. Do not forget that the number of sheets of the Case is affixed on it. For regulatory authorities, the signature in the assurance note is very important. It can only be set by the director or another person who has the authority to do so. All this is certified by a seal. Its print should lie down so as to capture part of the sheet and note. In fact, all these recommendations repeat the information we have presented above. We considered it necessary to bring them, so that you can make sure that you are doing everything correctly, in accordance with the instructions of higher authorities.
The tax authorities make an unambiguous requirement for the integrity and safety of not only the documents themselves, but also copies. Moreover, photocopies are also filed in a separate pack.
Instead of an afterword
We talked in the article about how to properly flash documents with threads for submission to the archive and regulatory authorities. Sometimes disputes arise regarding the design of binders, because there is no document that would give precise explanations on this issue, and even with comments. Therefore, it is necessary to focus on the standards adopted in office work. It must be remembered that the government agencies where you submit papers may have their own requirements for their design. Therefore, it is better to always clarify such information in advance in order to avoid errors and return documentation for revision. After all, everywhere there can be nuances.
When working with business documents, it is often necessary to file sheets into single journals. If the folder is organized in this way and certified by a seal, it protects the forms included in it from replacement or loss. Systematization of documents is carried out according to the rules of office work. They prescribe the order of numbering sheets and their filing in the journal. To fix the seam, a special tag must be glued. At the end of the article, you can download "Stitched and numbered" word samples.
After all the pages of the magazine have been numbered and stitched, a sticker is attached to the thread knot. It is a small paper rectangle, the dimensions of which are approximately 4 × 6 cm. It is recommended that several copies be prepared and printed on the printer in advance so that they are always at hand.
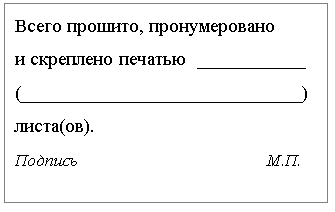
Example sticker includes the following fields for filling:
- The number of laced, numbered and sealed sheets. It is indicated first in numbers, then in brackets in words.
- The position of an authorized employee.
- Signature with decryption.
AT different samples wording may vary. As a rule, the sticker reflects only information about the number of sheets and the position of the employee responsible for the magazine. At the end is his signature.
Important! The sticker can be supplemented with the date of formation of the journal and the seal of the organization (if any).
When attaching, make sure that the knot of the thread is in the center of the sticker. The ends then go beyond the line of paper.
Preparation of documents for firmware
The first step is numbering. Before proceeding with the firmware of documents, you should put down the numbers in the upper right corner. This arrangement of numbers is dictated by the rules of office work.
Then the holes for the stitches are prepared. business documents have wide margins. Before flashing, approximately in the middle of these fields, three punctures are made. They go strictly vertically along the vertical center of the sheets. The step is at least 3 cm.
All sheets should be punched at the same level. To make holes use:
- hole puncher;
- awl;
- needle.
Due to maintaining the distance from the borders of the field after flashing, there is no inconvenience when reading the text. Also, it is not difficult to find the desired page.
How the firmware is done
Next question- how to flash documents with pre-drilled holes? A stitching needle is taken as a tool.
For a strong seam, you will need material such as:
- bank twine;
- sewing threads LSh-210.
If there are no specialized materials for connecting pages at hand, you can replace them with any strong thread. As an example, capron is suitable. You can also take a simple thread for sewing, folding it several times.
To make a strong, durable seam, it is recommended to repeat the stitches twice. However, you do not need to tighten the thread too much. A tight seam will make it difficult to flip through the magazine and find the right form.
When the firmware is finished, the tips are released through the middle hole of the last sheet. For fixing, the thread is tied in a knot. In this case, approximately 5 cm of ends should be left. For the integrity of documents, a sticker is attached to the knot, confirming that the magazine was laced.
The final stage - attaching the sticker
It is important to protect the documents collected in the folder from seizure or loss. Therefore, the sticker "Stitched and numbered" is used. Glue is applied to the back surface of the sheet. Then the paper is fixed in such a way that the center of the rectangle falls directly on the knot. Part of the threads will be hidden under the sticker. The ends should hang freely.
Next, you need to wait for the glue to dry. The line provided for this indicates the number of documents included in the this magazine. The completed form is certified by the head of the organization or an authorized employee. The sticker reflects the position of the employee, his signature and the date of certification. If available, the seal of the enterprise is affixed.
The main function of the sticker is to confirm the integrity of the journal and the documents included in it. For the same purpose, the knot is filled with glue. Both the tag itself and the documents are stamped with the organization's seal.
- The presence of a distinct, easily distinguishable signature.
- The presence of the same seal as on the documents of the organization.
- The location of the tag directly on the knot of the thread to fix the inviolability of documents.
To sew all the sheets evenly, remove all foreign objects. If the stack is large, it is recommended to take papers in small batches. When you need to organize several magazines in one various documents, they are stacked by date of signing.
In what cases are stitched documents required?
In most cases, firmware is required for reports submitted to tax office. In this case, the signature is put only by the head of the organization, and an imprint of his seal is put on the sticker. This is a mandatory requirement of the tax service.
As for individual entrepreneurs, for them the presence of a seal is a matter of choice. For the inspection, the personal signature of the entrepreneur will be sufficient. When the verification is completed, a stamp is placed on the forms.
Important! To certify a copy of a multi-page document, each sheet is stamped "Copy is correct".
As already mentioned, the signature and seal must be legible. The design of the stamp depends on the legal form. State-owned enterprises may use coat of arms seals. For LLCs and individual entrepreneurs, the legislation provides for other requirements.
Summarize. The sticker "Stitched and numbered" is made in the form of a paper rectangle. It is glued to the seam knot after the end of the firmware. The threads are covered with glue, a tag is applied on top. When the glue dries, the necessary notes are made on the sheet.
First, the number of sheets filed in the journal is indicated. Next, the signature of the head, his full name and signature is put. In some cases, this may be delegated to another responsible officer. Also on the sticker is the stamp of the organization. When submitting documents to the tax office, this is a mandatory requirement for an LLC. In case of individual entrepreneurs enough personal signature. Next, you can download a free sample sticker.
Each structural subdivision enterprises, no matter what size it is, at least once faced with the need to file documents.
This becomes necessary both for archiving and for some legal procedures. There are several methods for performing stitching. They will be discussed below.
Hemming in shape
Any enterprise during the year generates a certain amount of documents, some of which, after the expiration of the storage period, must go to the archive. This includes documents that have already been executed, as well as documents related to the personnel of the enterprise. According to the established practice, cases are transferred to the archive, one year after they are completed in office work.
The obligation to transfer documents is assigned to the employees of the service responsible for document management, or is entrusted to the secretary, accountant and other responsible person, and is fixed by the appropriate order.
In addition, secretaries of separate divisions are also involved here. Naturally, the transfer of cases occurs only after their final registration.
This procedure includes several steps:
- Cases are checked for the correct distribution of documents into groups;
- The filing is done;
- The page numbering is checked;
- An accompanying inscription is drawn up;
- An internal inventory is being made;
- Correction of requisites on the cover. This means a possible change in the name of the enterprise, the registration index, as well as the correction of the timing of the transfer and headings;
- A description of the filed case is carried out.
Allows partial registration of cases whose shelf life does not exceed 10 years.
In addition, it is allowed:
- Do not organize documents;
- Don't do pagination;
- Exclude the design of the certification inscription;
- Exclude firmware cases.
Legislation on "sewing"
Office work and paperwork are sufficient complex processes. It is not uncommon for documents prepared and transferred to the archive to be returned due to incorrect execution. Therefore, a completely logical question arises, how to properly stitch the documentation? You can find the answer in methodological recommendations on office work, which are fixed by the order of the Federal Archive of December 23, 2009 No.
>Legislation regulates the filing procedure. In this regard, recommendations are given that should be followed. Incorrectly bound documents may not be accepted into the archive for storage.
The archive of any enterprise allows you to save documents for a certain time period. Then the said documentation in without fail submitted to the archives.
The law provides for very specific deadlines that allow you to save the following documents:
- In relation to personnel, notarial records, business books - 75 years;
- Documents related to the transfer of state housing stock to private ownership - 75 years;
- Patents for inventions - 20 years;
- Capital construction - 20 years;
- Design documentation - 20 years;
- Scientific works - 15 years;
- Archival documentation of enterprises associated with agriculture- 5 years;
- Cinema - and photo documentation - 5 years;
- Video - and photo documentation - 3 years.
When an enterprise is liquidated, then documents with an indefinite period of storage are transferred to the state archive. In addition, documents on the personnel of the organization are also subject to transfer.
In the case of non-governmental organizations, it should be noted that a special regime of relations is provided for them. In particular, the law obliges them to enter into a separate agreement with the Federal Archival Service. If the contract is concluded late, then the archive will be obliged to accept only those documents that are related to the personnel of the enterprise. The fate of the rest of the documentation, i.e. the place of its storage, will be determined by the head of the liquidation commission.
Documents to be flashed

According to the letter of the law, it is necessary to flash all documents consisting of more than two sheets. This also applies to copies of statutory documents. However, documents that are not subject to subsequent transfer to the archive may not be flashed.
Why might this be needed?
The main factor explaining the need is the possible protection of documents, for example, from the removal or replacement of sheets. In this regard, they are stitched with threads, numbered and sealed.
A similar need arises in relation to accounting, personnel documents, as well as profit books and especially important agreements.
Additionally, this list may include notarized copies and translations. In addition, bound documents are easier to store. Cases arranged in this way take less space. Whereas, thread binding and sealing allow you to confirm the integrity of the documentation. Other official methods have not yet been invented.
How to properly archive documents

Following the completion of the case last step is a binder. This implies the removal of all metal objects (paper clips, pins). The documents are then to be released from the binder.
If the documents are completed, you need to add Blank sheet for an accompanying caption. In addition, at the beginning of the case, you can additionally attach sheets for an internal inventory. But, if there are already printed forms, then you can add them.
Regulations set limits on the number of pages in each case. Therefore, it is allowed to complete cases up to 250 sheets. In case more documents have been collected during the year, they should be divided into separate volumes. According to the standard procedure, documents are filed in hardcover.
If the case materials contain documents of different formats, it is necessary to file for 4 punctures. This is done in order to securely fasten documents.
As for cases that have a long shelf life, in this case they can be stitched through, along with the cover. Whereas, the generally accepted procedure for stapling documents with constant terms of savings, provides for the beginning of filing from the sheet that follows the binding. Then, on the first sheet, you need to put a cardboard gasket and flash the case. This is necessary in order to protect the threads from premature wear.
Here we should not forget that the case will actually be stored forever. The main thing during filing is border control, so you also need to make sure that the threads do not go beyond the text. It should be easy to read even when stitched.
Documents with a shelf life of no more than 10 years can be stored without firmware in a binder.
In some institutions, for convenience, special booklet machines are used. But this method is unacceptable for archival filing.

The next step in the affairs of indefinite storage is numbering. It is usually done for convenience in working with documents. To make the numbering, use a black pencil or a special numbering machine. A separate place is provided for putting numbers, this is the upper right corner of the document.
It should be noted that the numbering occurs exclusively on the front side. Numbers should not hurt main text. The use of colored pencils is prohibited. The use of ink is also not allowed.
When a sheet of a larger format than A4 is placed in the case, then it is allowed to hem it at one edge and fold it, after which it must be numbered as 1 sheet. In case the sheet was folded and then hemmed in the middle, then it must be numbered as 2 sheets. Illustrated materials are to be numbered on the reverse side.
A separate place is provided for putting numbers - this is the upper left corner of the document. In the case of stitching envelopes that are accompanied by attachments, such documents are subject to self-numbering. Attachments are numbered with the number that follows the one on the envelope. If you need to divide the case into separate volumes, then each of them is numbered separately.
The design of the cover takes place at the stage of the establishment of the case. Here you need to be guided by the recommendations of GOST 17914-72. Covers of cases of long-term storage ....
Therefore, at the stage of establishing a separate business, individual information are submitted for binding, in particular:
- Company name;
- The name of the separate subdivision;
- Office work index;
- case title;
- Storage period.
Cases that should be transferred to indefinite storage are mandatory stitched into a strong cardboard cover, on which the spine is attached. The resulting folder cannot be thicker than 4 cm.
An archival book has its own standard, which cannot exceed 320 x 230 mm.
To simplify the firmware procedure, you can use archive folders. A separate option for solving this problem are binding machines. As another option, you can bring the procedure for filing bank cash documents. The thickness of the folder of this category of documents can reach up to 10 cm.
So, analyzing the archival processing of documents, we can come to the conclusion that the most difficult task is the procedure of drilling paper blocks. However, high-performance paper drilling machines can come to the rescue here.
Preparatory work

To staple documents, you must first straighten the stack of paper. But if the pack contains a large number of documents, consisting of small sheets, then it is necessary to lay the stack so that it can be evenly clamped with a clamp. To align too many documents, such as up to 1,000 sheets, then it is wise to use an electric paper pusher.
After laying the documents, you need to fix them well in the clamp, after which you can start drilling the entire block. In this case, the number of holes can be 2–5 pcs. Drilling is carried out using a conventional electric drill or specialized piercing equipment. Separate stitching models are equipped with a mechanism that automatically threads the thread through the holes made. In case drilling is done with a drill, do not rush to remove documents from the clamp so that the holes do not move.
Hand threaded

Photo: How to properly sew documents with threads
When asked how to properly stitch documents with a thread, it must be said that for this you need to take an ordinary needle, thread and stitch sheets that have only 2 punctures.
After the document is stitched, you need to tie the ends of the thread on the back of the document and glue a small piece of paper onto the resulting knot.
After that, a certification inscription is made about how many sheets the document contains, by whom it is certified. This procedure is done in such a way that the inscription (print) protrudes beyond the borders of the sticker. It should be recalled that pages are subject to mandatory numbering. As practice shows, stitching documents correctly with a thread is simple, but, unfortunately, this method has its limitations. More than 5 sheets are hard enough to pierce with a needle. Therefore, it is better to use a hole punch in such cases.
Hole punch (lacing)
As mentioned above, if there are more than 5 sheets of documents, it is better to use manual stitchers. More best solution can devices with an electric drive (electric punches). To do this, 4 holes are evenly distributed on the margins of the document, but in such a way that the text is readable.
Next, the lacing of documents is used, with its help the documents will be ordered, and control over their safety will also be ensured. These rules are governed by different regulations. Contracts, notarized documents, cash books, bank documents are stitched in this way. This list also includes personal files, registration journals, as well as strict reporting forms.
Watch the video on how easy it is to sew documents using a hole punch:
Accompanying inscriptions
After stitching and numbering the case, you need to draw up a certification inscription. In practice, this is done on a separate piece of paper, which is then fixed on the back of the case. Mandatory to indicate in the certification inscription is the number of numbered sheets.
This information is indicated both in numbers and in words.
It should be noted that the position of the responsible person and the decoding of the signature should be indicated on the accompanying inscription. The prepared inscription is attached with high-quality glue. At the same time, its function is also to fix the node. In such a way that the ends of the thread are free. All this is sealed at the end with a seal, the imprint of which should be on the sticker and sheet.
 The territory of registration of a business entity is reflected in the statistical code. Read what is
IP insurance premiums are required to be paid in deadlines. Find out more
How relevant is the firmware of documents in 2019?
Every organization has its own internal archive, which provides systematization various documents. This includes accounting registers, personnel orders, etc. Documentation intended for subsequent transfer to storage in state archive, without fail, must undergo a preparatory procedure in accordance with the existing GOST.
And in 2019, no one canceled the mandatory procedure. Thus, the firmware of documents has not lost its relevance.
Despite the widespread introduction of new technologies and the transfer of part of office work to electronic form, in most state-owned enterprises, paper remains the main carrier. Especially paper is loved in various controlling and executive bodies: tax, pension fund, fire inspection, courts, financial institutions etc. That is why any entrepreneur should be able to bind documents properly number and register them. The firmware is usually performed using a thread with a needle, a stapler or special machines. We will tell you more about how to properly sew documents and cases.
Thread firmware
Actually none strict rules and there are no requirements for binding documents. Nevertheless, there is GOST R 51141-98 “Office work and archiving” and an order from the Federal Archive of December 23, 2009 No. 76, which gives recommendations on the firmware of multi-page documents.
Proper firmware documents will protect them from substitution
How to do everything right? You will need an awl, a gypsy needle, strong black thread, a piece of paper, and glue. Usually, papers are sewn through three holes - one is made in the center of the sheet about 1.5-2 cm from the edge, the second and third - on the sides of the existing one at a distance of 3-5 cm. Punctures are made with an awl - if you do not have enough strength to pierce immediately the whole pack, then you can divide it into several parts. Below we give an example, how to properly flash documents with threads and a photo of the process.
Note:if you have a drill or a screwdriver and a drill, you can simply drill a pack of paper. The drill diameter should be about 6-8 mm.
The firmware of the pack starts from the back. Pass the thread through the needle and pull it through the central hole, leaving a “tail” of 7-10 mm. Then insert the needle into the upper hole from the front side and pull the thread to the back.

We start from the central hole, stretch through the top and go down to the bottom
Next, you need to drag the needle through the bottom hole, bring it to the front side, and then stretch it to the central one to the existing “tail”. Now you can cut the thread, leaving at least 7 cm (if you need to print the case, then leave a margin of 15 centimeters). Tie the beginning and end of the threads, and glue a small piece of clean paper on the knot. If these are papers of strict accountability, then the “tails” are glued to the last sheet with a paper square and a seal is put on it.

The knot after flashing the documents is sealed with a paper square
It is allowed to stitch documents with a threadand two holes. Usually this method is practiced in the presence of a hole punch. The scheme changes slightly - the needle is inserted into the lower hole from the back, a “tail” is left at least 7 cm long. Then the needle and thread return through the upper hole. Next, cut the thread so that you get a second tail 7-10 centimeters long and tie it with the first. The ends of the thread go down, and a rectangular piece of paper measuring 2 by 7-8 cm is glued onto the knot.
To securely fix the pack, you can also sew it through 4 punctures. In this case, the needle is threaded from the second hole, inserted into the upper one, pulled through the second one again and fed to the third and fourth. Stitching is done on the third hole, and the entire strip of thread is sealed with paper.
Note:It is not recommended to use ordinary thread for stapling documents, as it is rather fragile. You need to either fold it several times, or use a special nylon twine.
Sometimes documents are sewn together with a transparent fishing line, but according to its characteristics, it is worse than a thread. The main thing is that all three (four) holes are made vertically in one line. Usually 1.5 cm recede from the wide edge of the sheet. The firmware is always started from the rear, so that the knots are at the back and do not spoil the appearance.

Be sure to indicate the number of pages and put a signature
Certification of documents
After we have learned stitch documents correctly let's learn how to complete them. For this, the sheets are numbered. The tails are sealed with a small paper rectangle, on which they write with a pen: "Stitched, numbered, sealed and signed." Next, the number of sheets is indicated in digital and alphabetic form, a seal, painting and initials are put. It is necessary to do this in such a way that part of the signature and seal is both on the pasted rectangle and on last sheet. This is done so that if someone cuts the thread, it would be immediately visible. Also, the date of firmware and certification in digital form is usually indicated.
